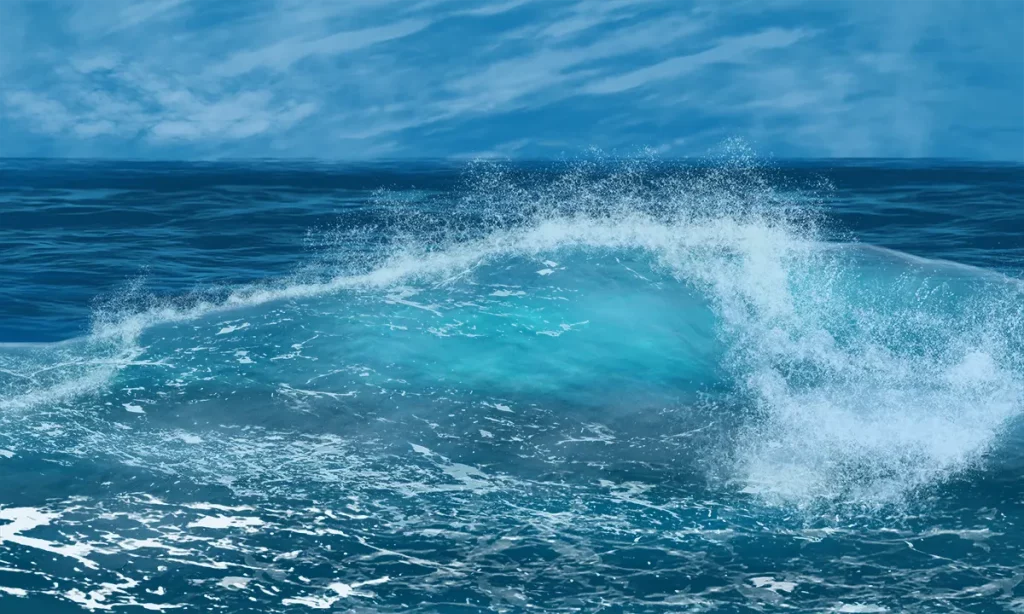
How to Paint Stunning Ocean Waves in Photoshop
Ever wondered how to capture the mesmerizing movement of ocean waves in your digital art? Painting realistic ocean waves can seem daunting, but with the right tools and guidance, anyone can master this art form. In this comprehensive guide, we’ll walk you through the entire process of painting ocean waves in Photoshop, from setting up your workspace to adding those final, intricate details that make your waves come alive. We’ll be using our custom brush sets designed specifically for painting ocean waves, ensuring that even beginners can achieve professional-quality results. You’ll learn how to create the gentle ebb and flow of a calm sea as well as the dramatic crashes of stormy waves. By the end of this guide, you’ll have the skills and confidence to bring the beauty of the ocean to your digital canvas. Ready to dive in? Let’s get started with the essentials and discover the joy of painting ocean waves in Photoshop from scratch!
Tutorial Assets
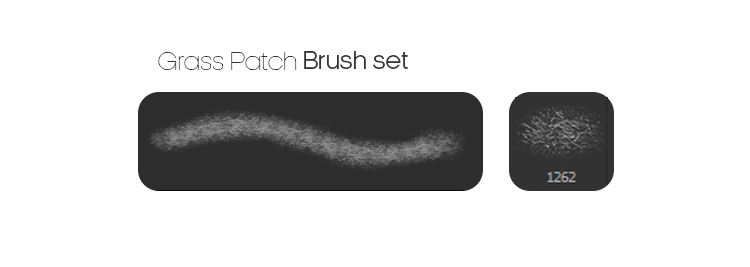
Before you start painting, you’ll need to import your custom ABR brushes into Photoshop.
Step 1: Draw a Quick Sketch of the Wave
Before diving into the detailed painting process, it’s crucial to have a clear vision of the wave you want to create.
A quick sketch serves as a foundation, helping you to map out the overall shape and movement of the wave.
Here’s how you can get started: – This is an example of a quick wave sketch to get you started.
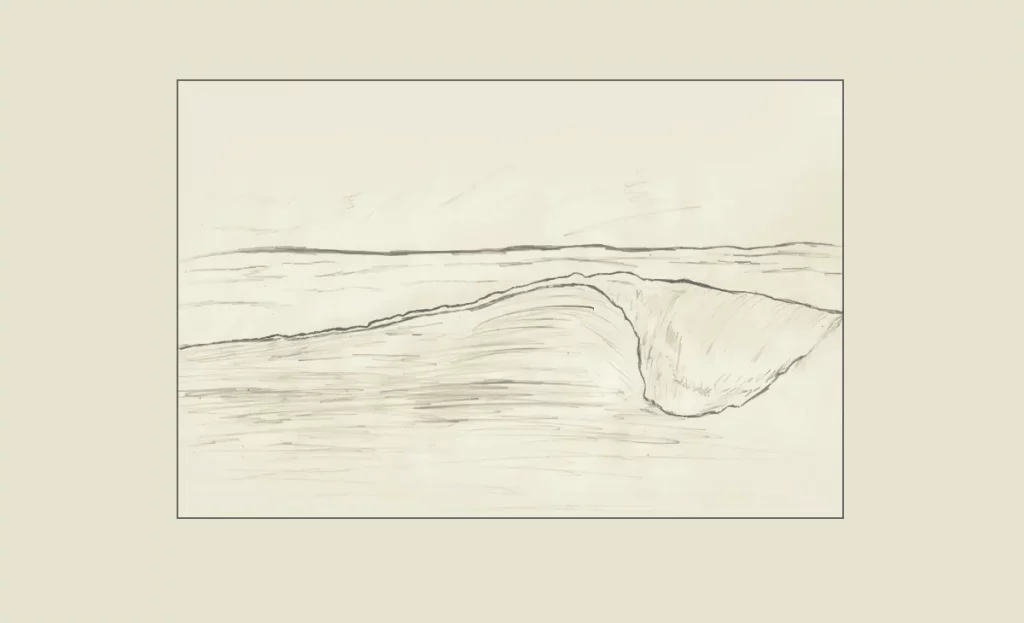
This initial sketch will serve as a road map for the rest of your painting process. Don’t worry about making it perfect; it’s just to give you an idea of the wave’s structure and flow.
Step 2: Select the Color of the Waves
Choosing the right color palette is essential for creating realistic and visually appealing ocean waves. For detailed guidance on how to select colors from images, be sure to read our article “How to Select a Color Palette from Images.”
For this tutorial, I’ll use these colors:
- Background:
#3189b9 - Peak:
#7fb9dd - Face Wave:
#7fb9dd - Splash / Foam:
#cae5f0 - Lighten
#5c9a9f - Bright Color:
#38a8bb - Ocean Base:
#053d62 - Ocean Highlight:
#20749c - Cloud:
#69add9
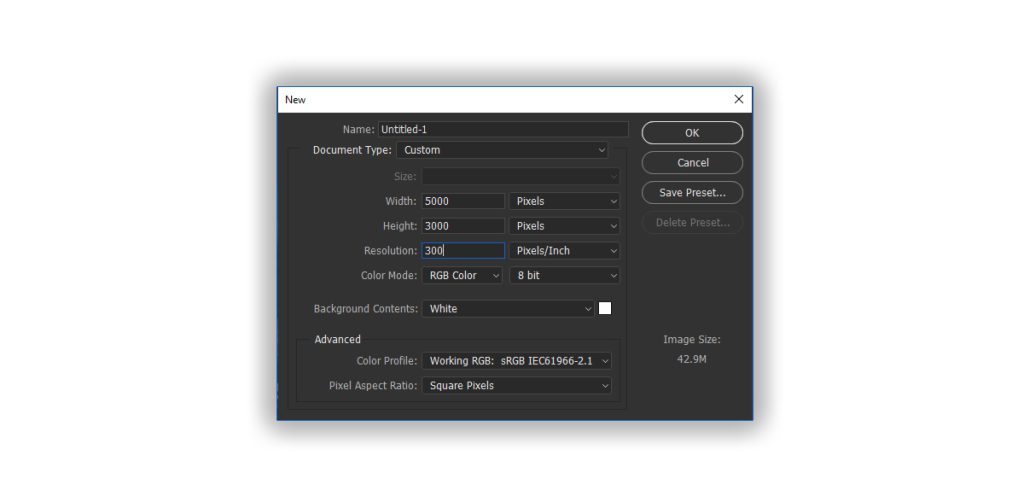
Next, let’s set up our new document:
- Open Photoshop: Launch Photoshop on your computer.
- Create a New Document: Go to
File > Newto open the New Document dialog box.
Open a New Document in Photoshop at 5000 x 3000 pixels and 300 dpi.
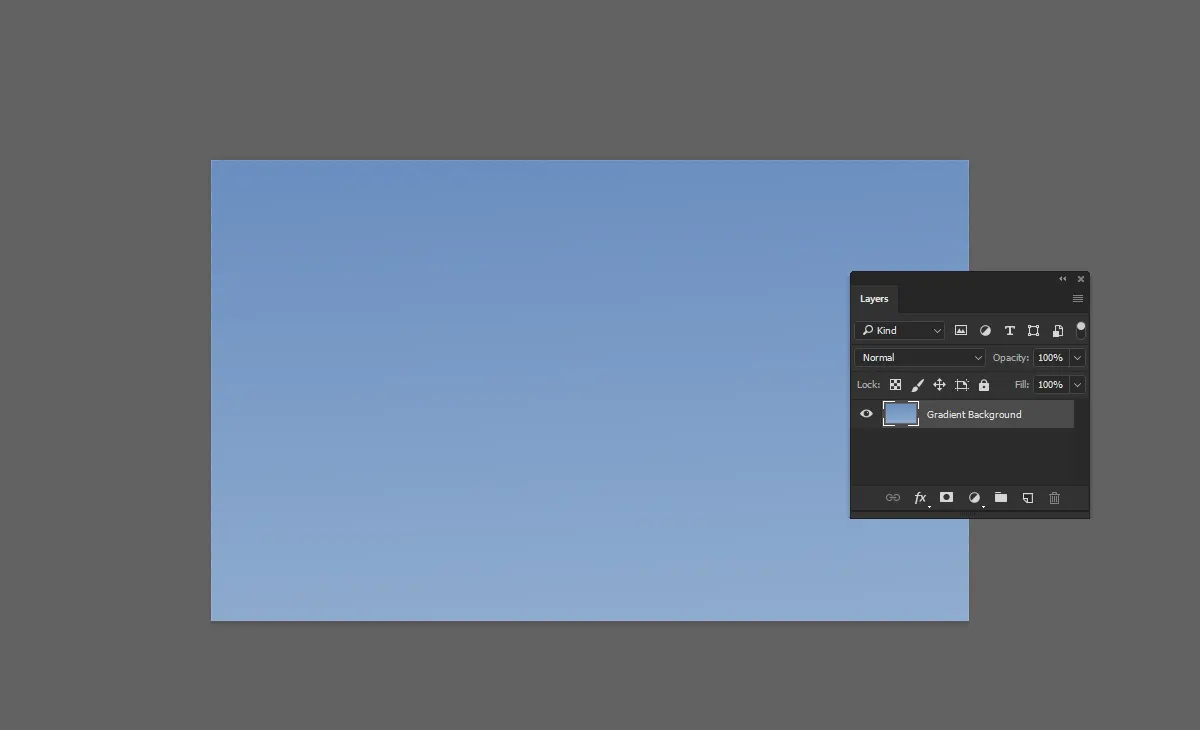
Step 3: Fill the Background
To create a visually appealing base for your ocean waves, let’s fill the background of our canvas with a suitable color.
- Select the Paint Bucket Tool: In the toolbar on the left, select the Paint Bucket Tool (G). If you can’t see it, right-click on the Gradient Tool to find it.
- Choose Your Background Color: Click on the Foreground color at the bottom of the toolbar to open the Color Picker. Enter the hex code
#3189b9.
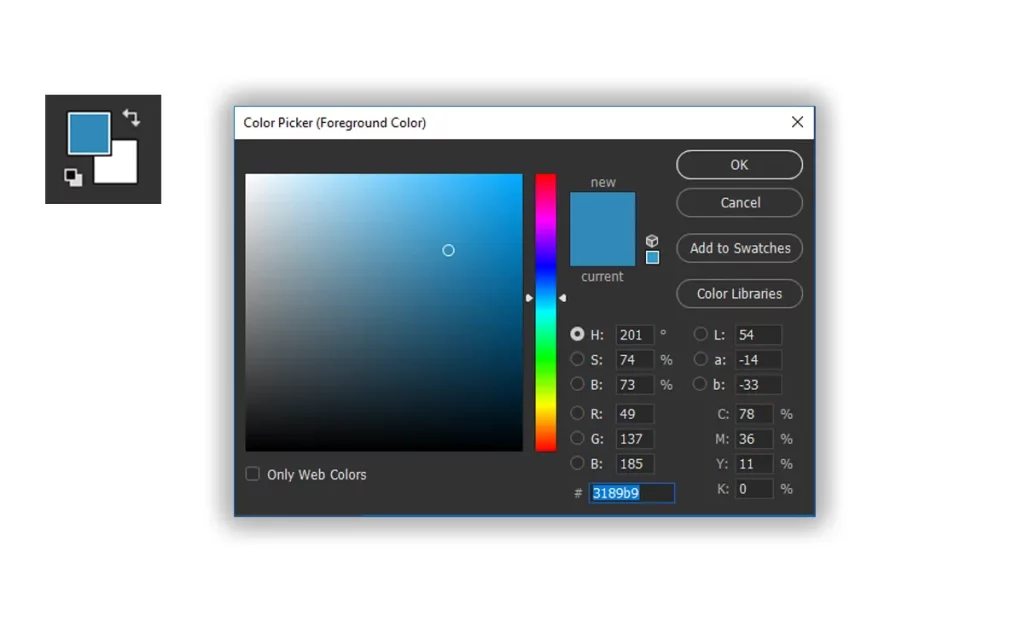
- Fill the Background: Click anywhere on the blank canvas to fill it with the chosen color.

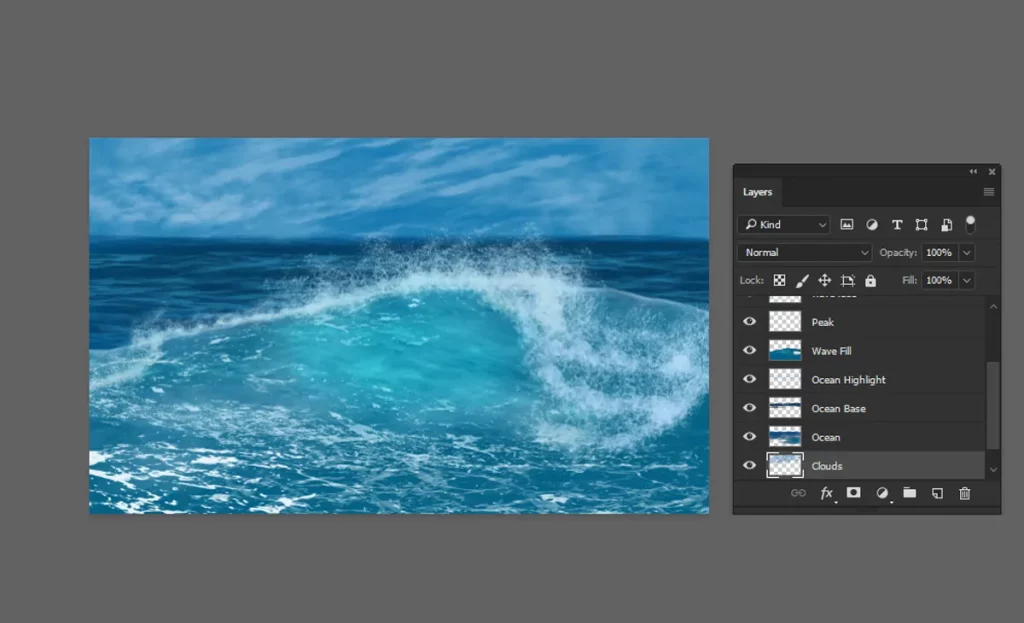
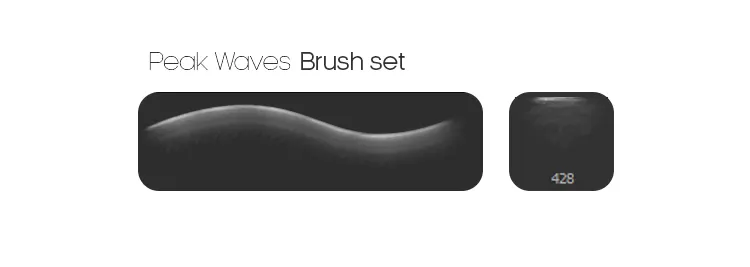
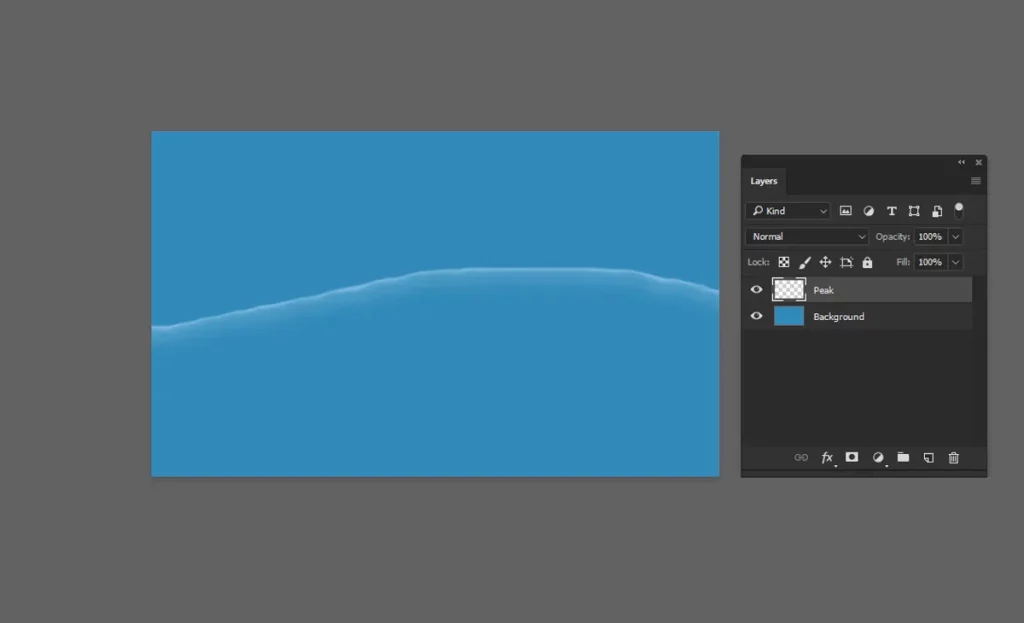
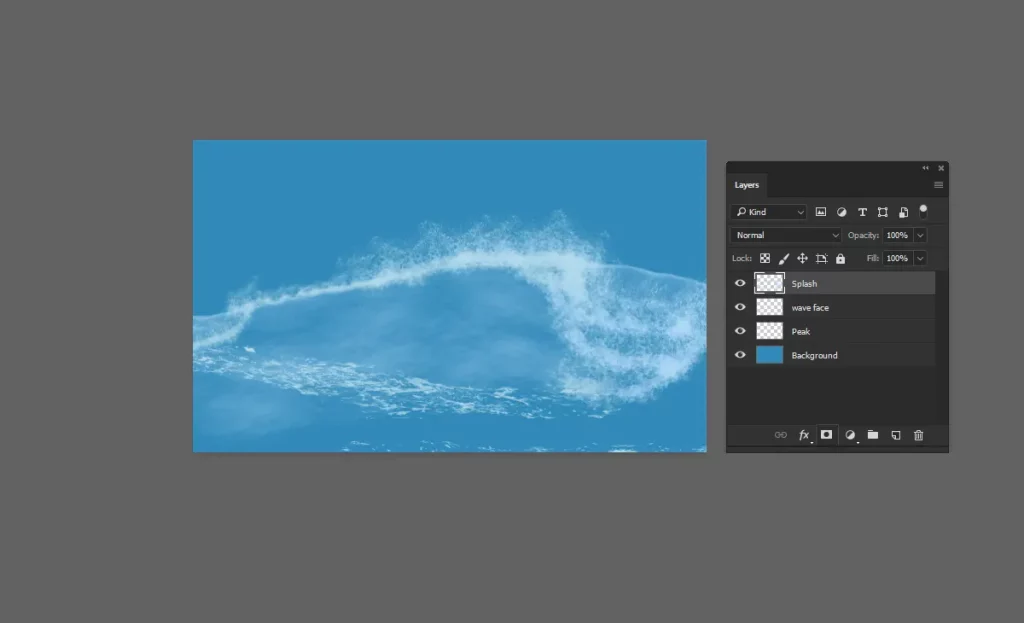
Step 4: Paint the Peak
The peak is the topmost part of the wave, following the direction we sketched earlier. This is where the wave starts to crest, creating a beautiful highlight that gives the wave its dynamic appearance.
- Select the Peak Brush: From your custom brush pack, choose the brush designed specifically for painting the peak of the wave.
- Choose Your Peak Color: Set the Foreground color to
#7fb9dd. This color will help highlight the peak and add a sense of light and depth. - Paint the Peak: Using the selected brush, carefully paint along the top of your wave sketch. Follow the natural curve and direction of the wave. This will help emphasize the movement.
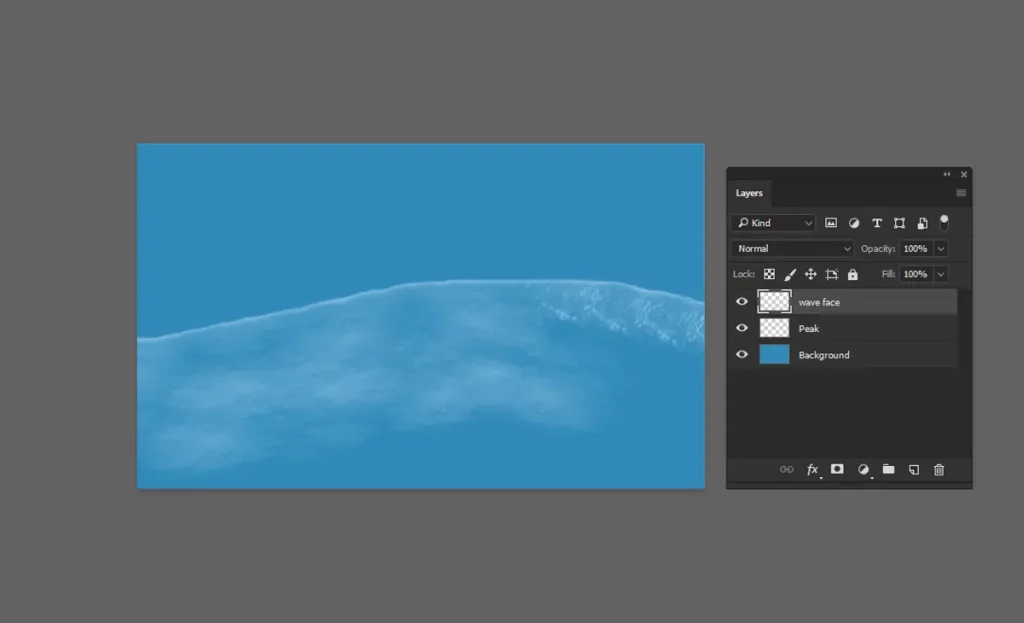
Step 5: Paint the Face of the Wave
Adding depth to your wave involves painting the face, which is the forward-facing part of the wave that catches light differently. Here’s how to do it:
- Create a New Layer: In the Layers panel, click the
New Layericon to create a new layer above your background layer. This keeps your edits non-destructive and allows for easier adjustments later. - Select the Face Brush: From your custom brush pack, select the brush designed for painting the face of the wave. These brushes are tailored to create the smooth, flowing texture of the wave’s face.
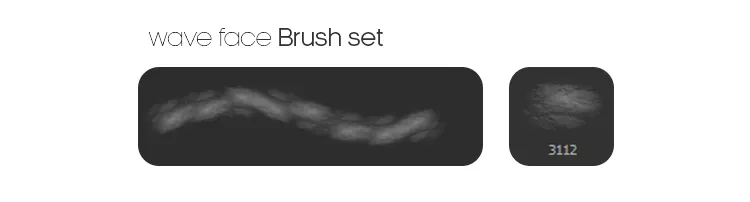

- Set Your Color: Use the same color as the peak,
#7fb9dd, to maintain color harmony in your artwork. - Paint the Face of the Wave: Using the selected brush, paint the face of the wave, following the contours and direction of your initial sketch. Take your time to build up the color and texture, creating a sense of volume and movement.
- Explore Different Brushes: Don’t forget to explore other face brushes in your pack to paint different types of waves. Each brush can offer a unique texture and style, enhancing the overall realism of your ocean scene.
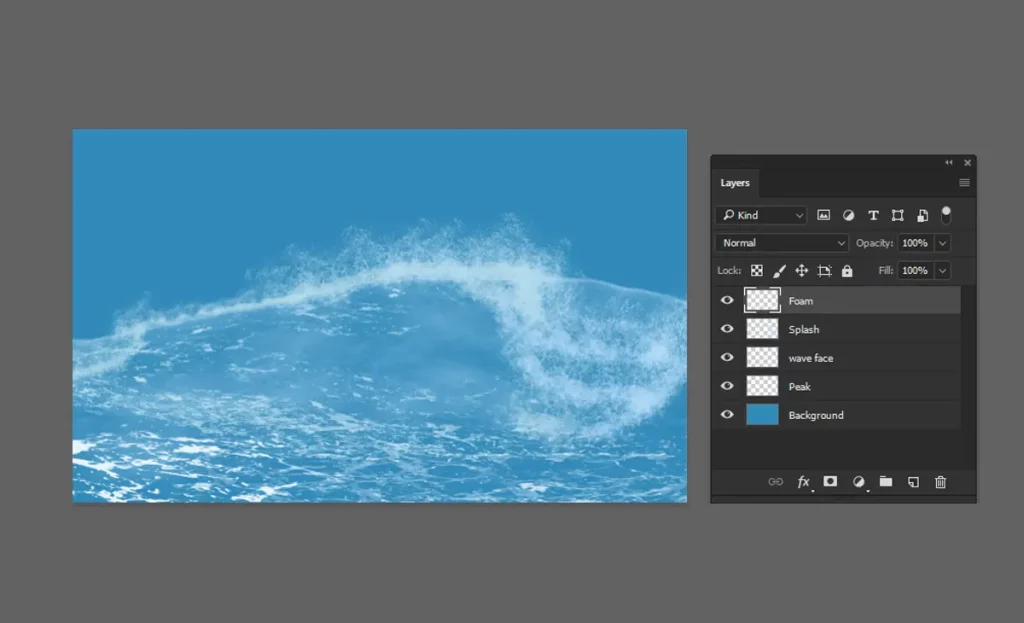
Step 6: Paint the Splash
The splash of the wave is where the water breaks and sprays, creating a foamy, dynamic texture. Here’s how you can paint the splash:
- Create a New Layer: In the Layers panel, click the
New Layericon to create a new layer above your existing ones. This will keep your splash separate from the rest of your painting, making it easier to adjust. - Select the Splash Brush: From your custom brush pack, select the brush designed for painting the splash. This brush is versatile and can paint in any direction, allowing for dynamic and realistic wave splashes.

- Choose Your Splash Color: Set the Foreground color to
#cae5f0, which is perfect for highlighting the splash of the wave. - Paint the Splash: Using the selected brush, follow the direction of your initial sketch to paint the splash. Focus on the areas where the wave starts to break, adding details and texture to create the appearance of foam and movement. The brush should be able to follow the natural flow of the wave, enhancing the realistic look.
Step 7: Paint the Foam
Adding foam to the wave will give it that extra touch of realism and movement. Here’s how you can do it:
- Create a New Layer: In the Layers panel, click the
New Layericon to create a new layer above your existing ones. This keeps your foam separate and easily adjustable. - Select the Foam Brushes: From your custom brush pack, select a brush designed specifically for painting foam. There are various foam brushes in the pack, so feel free to experiment with different ones to achieve the desired effect.


- Use the Same Color: Set the Foreground color to
#cae5f0,the same color used for the crest. This ensures consistency in your wave’s highlights. - Paint the Foam: Using the selected brush, paint along the crest and the face of the wave to create the appearance of foam. Focus on areas where the water breaks and churns, adding small details to enhance the sense of movement and texture.
By adding foam, your wave will look more dynamic and realistic, capturing the natural beauty of the ocean.
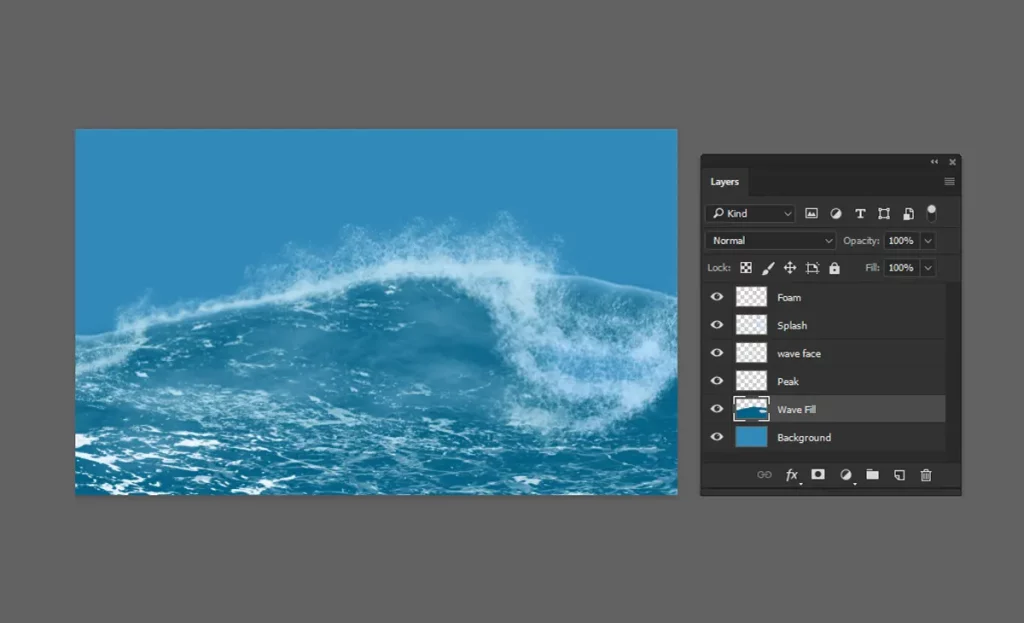
Step 8: Paint the Wave Fill
To add more depth and contrast to your wave, we’ll paint the inner wave area. This will help define the wave’s body and enhance its overall look.
- Create a New Layer: In the Layers panel, click the
New Layericon to create a new layer. Drag this layer below the peak layer in the layer stack. - Select the Wave Fill Color: Set the Foreground color to
#036185. This deep Ocean Blue will provide a strong contrast against the highlights of the wave. - Paint the Inner Wave: Using a suitable brush from your custom brush pack, paint the inner wave area. Focus on filling the main body of the wave, following the curves and directions of your initial sketch. This will give your wave a more solid and three-dimensional appearance.
By adding this base color, your wave will have a stronger structure and a striking contrast that highlights the movement and power of the ocean.
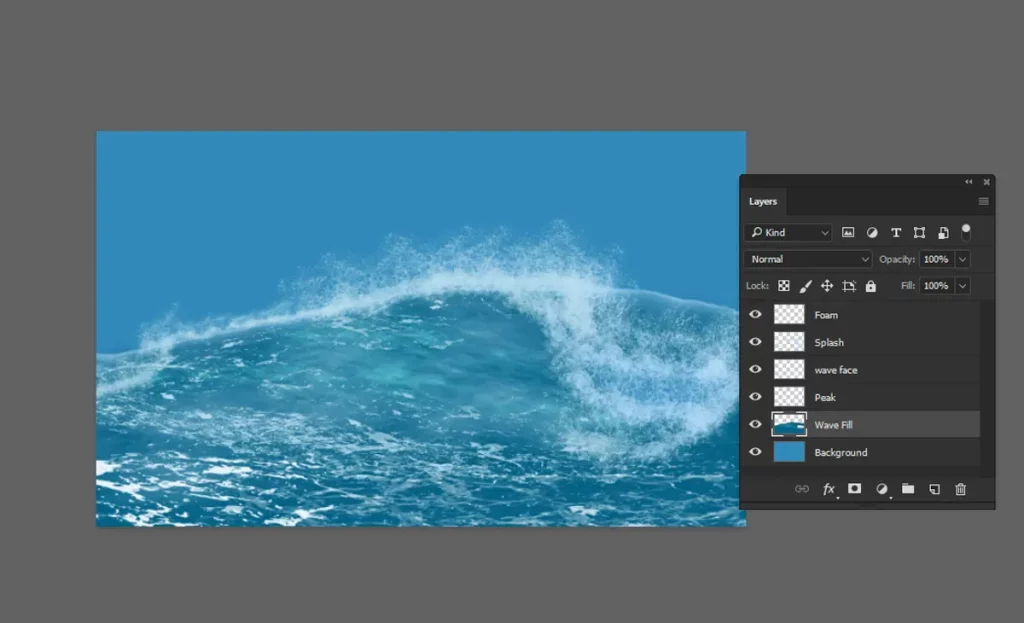
Step 9: Paint the Bright Color on the Same Layer
Adding brighter colors can enhance the highlights and make the wave look more dynamic. Let’s paint these highlights to bring out the detail and contrast.
- Select the Face Wave Brush: From your custom brush pack, choose the brush designed for painting the face of the wave.
- Choose the Bright Color: Set the Foreground color to
#38a8bb(Sky Blue). This color will work well to add highlights and make the wave appear more vibrant. - Paint the Bright Highlights: On the same layer where you painted the inner wave, use the face wave brush to add touches of the bright color. Focus on areas that would naturally catch the light, such as the upper parts of the wave’s face and near the crest.
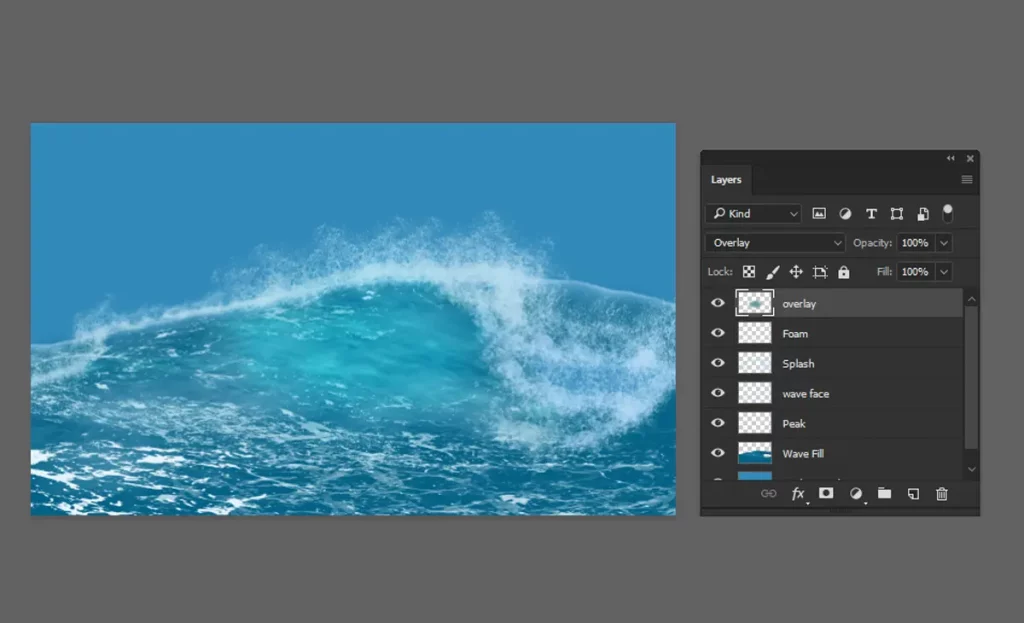
Step 10: Create an Overlay Layer to Lighten the Area
To enhance the lighting and add a more dynamic look to your wave, we’ll use an overlay layer. This will make certain areas appear lighter and more vibrant.
- Create a New Layer: In the Layers panel, click the
New Layericon to create a new layer above your existing layers. - Set the Layer Mode to Overlay: Change the blending mode of this new layer to
Overlay. This will allow the colors you paint to blend with the layers below, creating a lighter and more natural effect. - Choose the Overlay Color: Set the Foreground color to
#5c9a9f. This Soft Aqua color will help to brighten the wave areas without overwhelming the existing colors. - Paint the Lighter Areas: Using a soft brush, gently paint over the areas of the wave where you want to add more light. Focus on the parts of the wave that naturally catch the most light, such as the peaks and the face of the wave. This will add a luminous effect and make the wave appear more dynamic.
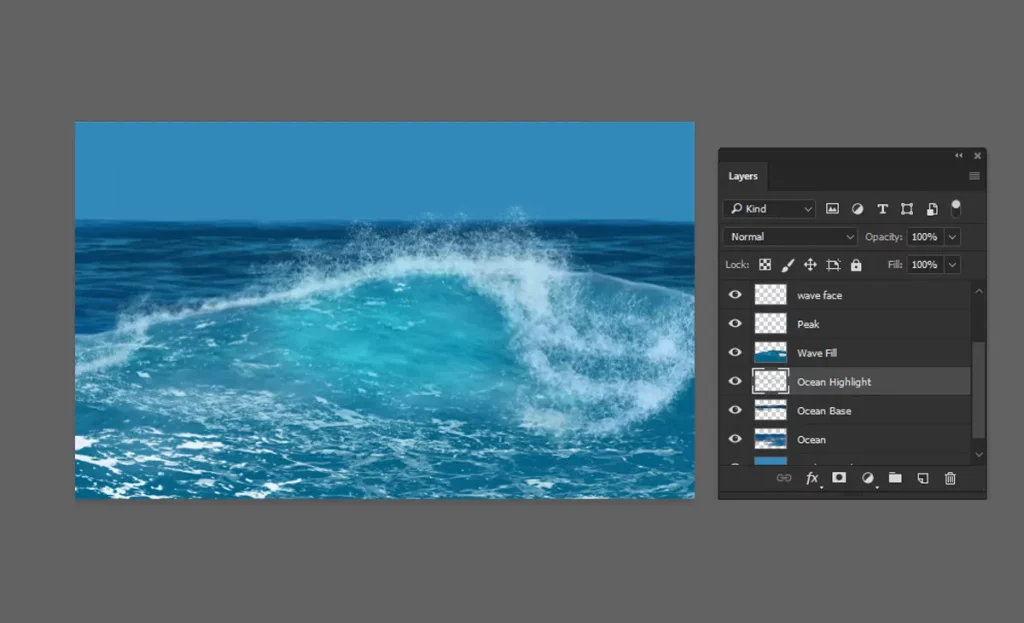
Step 11: Paint the Ocean
To complete your ocean scene, we’ll paint the vast expanse of the ocean using a base color and highlight color to add depth and dimension. For detailed guidance on painting the ocean, be sure to read our article “How to Paint the Ocean.“
- Create a New Layer: In the Layers panel, click the
New Layericon to create a new layer. This will ensure that your ocean painting remains separate from the wave details. - Choose the Base Color: Set the Foreground color to
#053d62. - Paint the Base Layer: Using a large, soft brush, paint the entire ocean area with the base color. This will create a solid foundation for your ocean.
- Select the Highlight Color: Change the Foreground color to
#20749c. This color will add highlights and enhance the overall depth of your ocean.
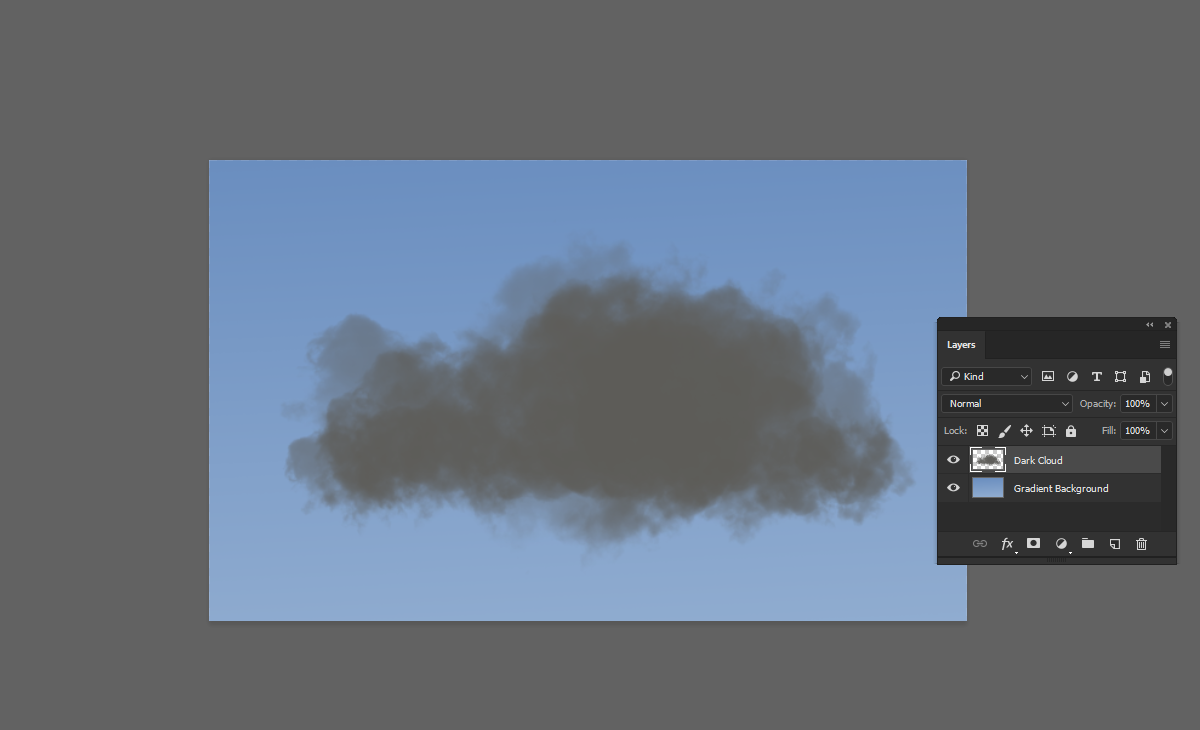
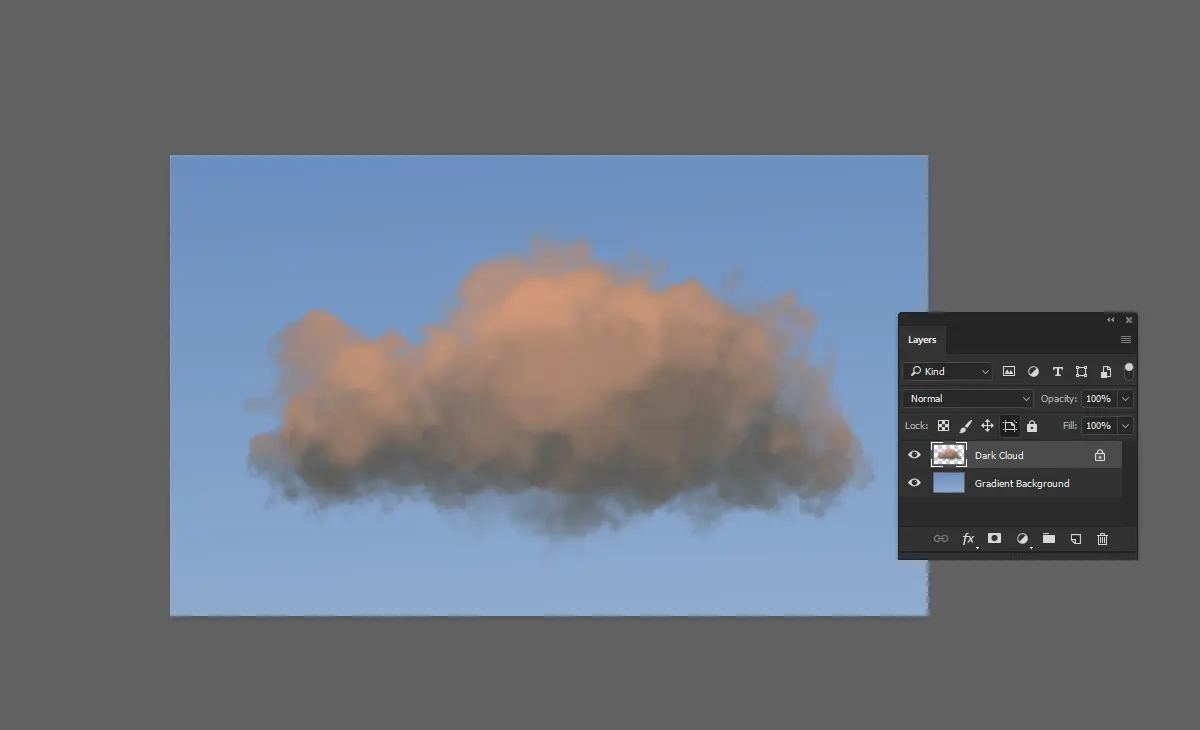
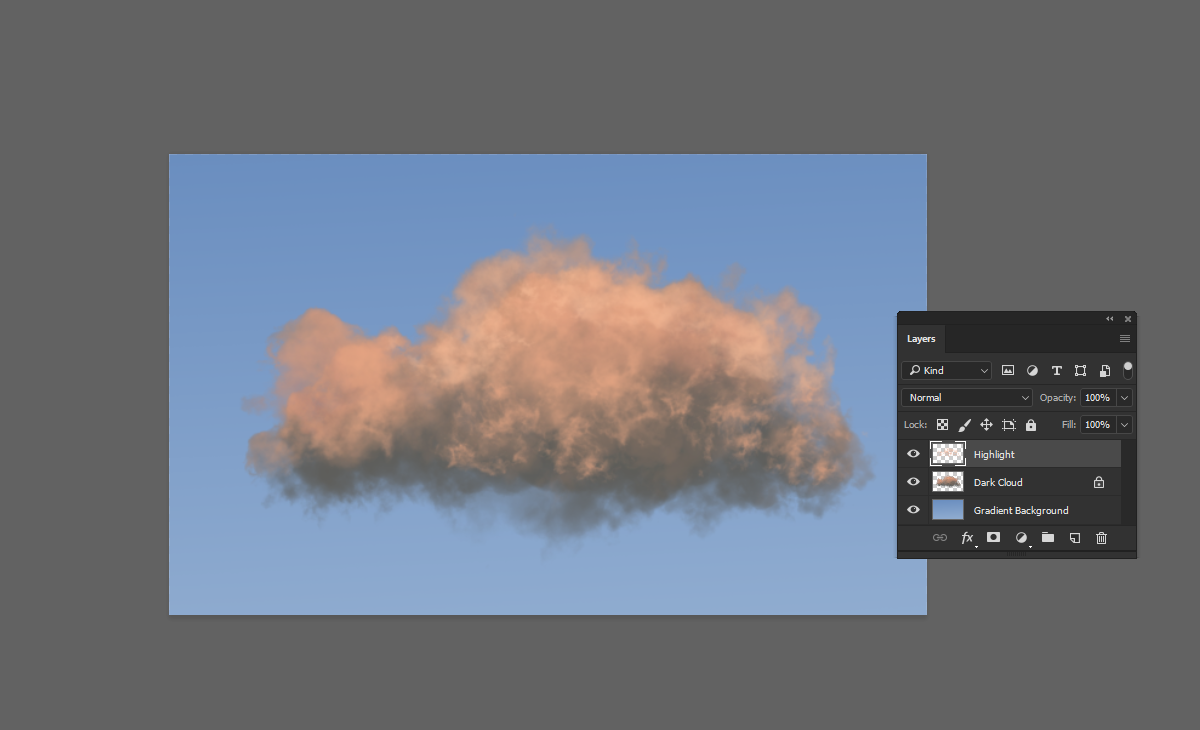
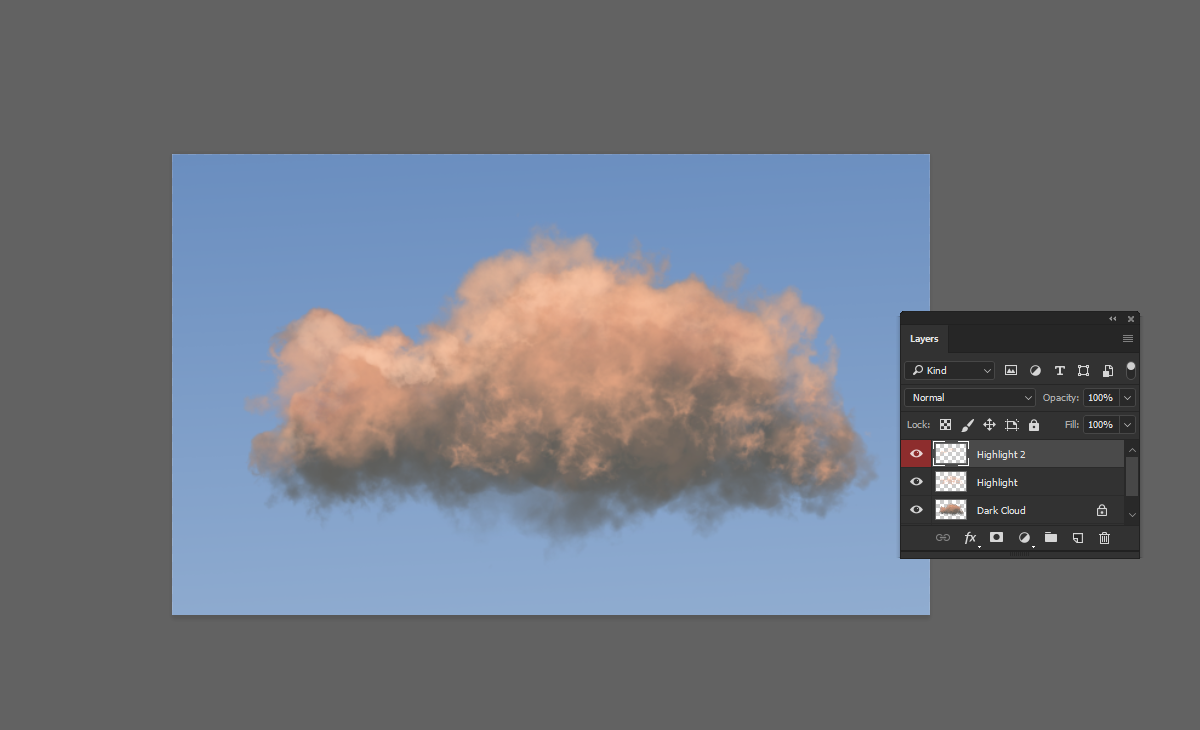
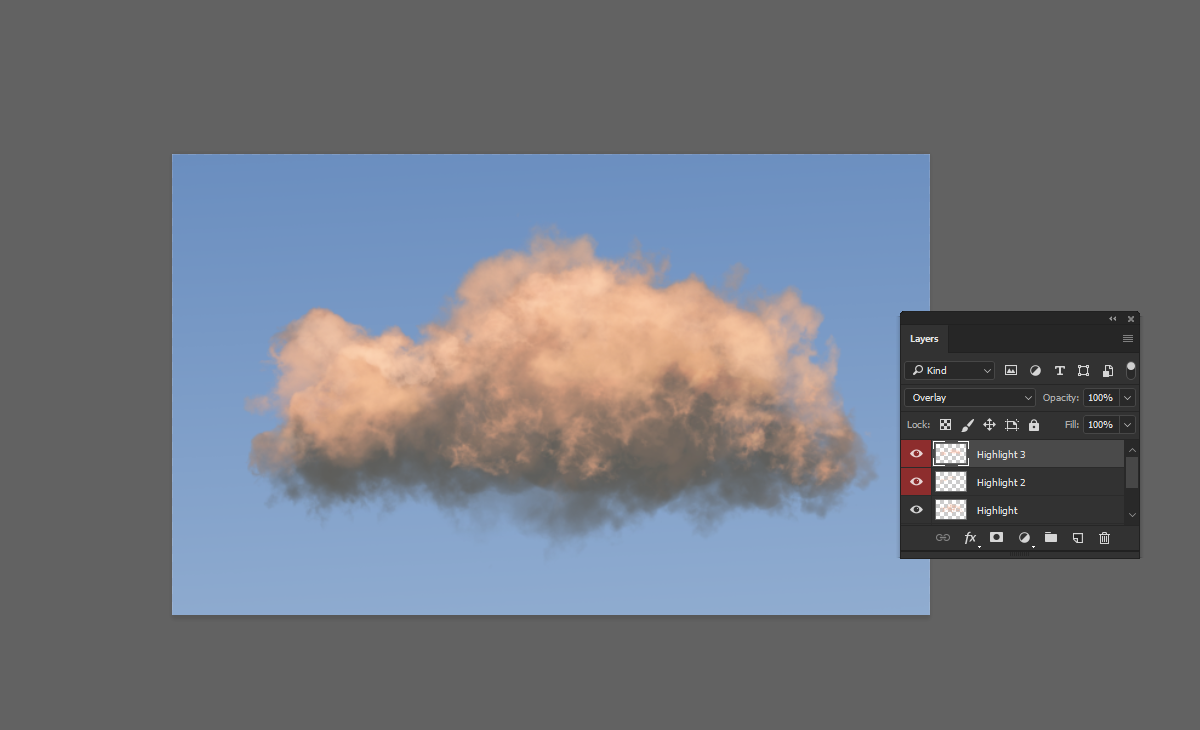
Step 12: Paint the Clouds
Adding clouds to your scene can create a more dynamic and atmospheric composition. Here’s how you can paint clouds in Photoshop:
- Create a New Layer: In the Layers panel, click the
New Layericon to create a new layer above your existing layers. This will ensure that your clouds are separate from the ocean and waves. - Choose the Cloud Color: Set the Foreground color to
#69add9. will give your clouds a light and airy appearance. - Select a Cloud Brush: From your brush pack, select a brush designed for painting clouds. Cloud brushes are typically soft and fluffy, allowing you to create realistic cloud shapes.
- Paint the Clouds: Using the selected brush, gently paint the clouds in the sky area of your canvas. Start with broad strokes to define the overall shape of the clouds, then add smaller, detailed strokes to create texture and depth.
For detailed guidance on painting clouds, be sure to read our article “How to Paint Clouds in Photoshop“.